 In this article, we will step through a simple blaster modification that resolves the biggest drawback in the otherwise excellent Adventure Force Liberator pump-action shotgun-style HIR blaster.
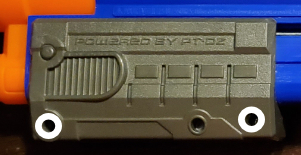
 This modification is thanks to Adrian Sue who shared it on Thingiverse. The part itself is a small, quick print. My print, as you can see, isn’t the prettiest, but it is functional. You may need to do a little clean-up and trimming around the edges, depending on your print.
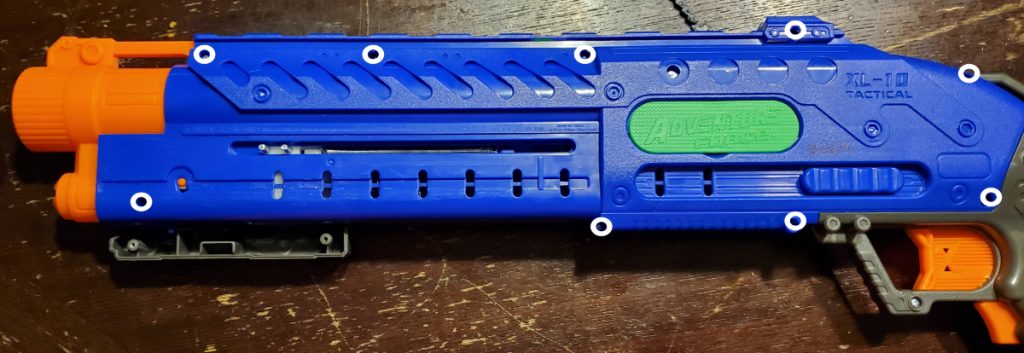
Opening up the Liberator is simple. First, remove the pump grip to expose the last body screw by removing the two screws on the left side. I found it best to only remove one side of the pump grip as leaving the side with the posts helps keep internals in line.
Once separated, remove the reset button pin and set it aside so it doesn’t fall out in the next step.
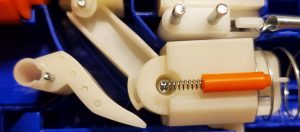
Next, remove the feed ramp from its hinge pin, leaving the torsion spring in place.
We’re going to trim the end of the ramp just below the last roller. Try not to get to close so the last roller will stay in place. once clipped, you’ll want to sand the sharp edges a bit. The plastic is soft, so it’ll take very little work.
Now set that aside and we’ll work on the loading door.
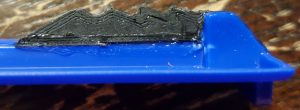
 With a pair of snips, remove the end of the hollow channel at the front end of the door flush with the top of the center rib. Be gentle as the plastic will spread at the cut and may stress.
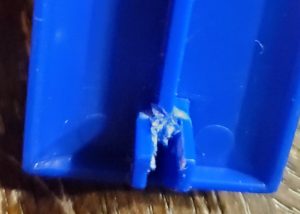
Clean it up as best you can. The printed part has a little tolerance, but does need to sit flat on the rib.
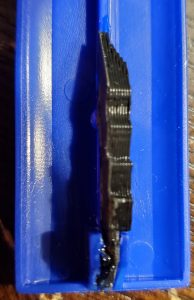 Trim the print so that it will sit flush on the center rib with the hook end tucked over the cutout. Make certain to trim the top of the print sandwiched in the cut-out so it is flush or lower than the top of the tray or it will prevent the door from fully closing.
I used Loctite Gel, along the full length of the rib and in between the sandwiched portion. Any plastic friendly glue should do, just remember about the clearance.
Once dried, place the tray back in place to verify it will close completely. Trim if need be.
Now we reassemble!
 The only slightly difficult part I had with this was making certain the torsion spring was in the correct place. The way I found easiest was to slide the ramp back on in it’s all the way open position the twsit it toward the top of the blaster while applying light pressure downwards. This assist in getting the bottom arm hooked on the right part of the ramp.
Next, put the reset pin back into place, put the door back in and close the shell back up. At this point you can screw the shell back together.
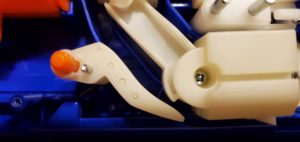
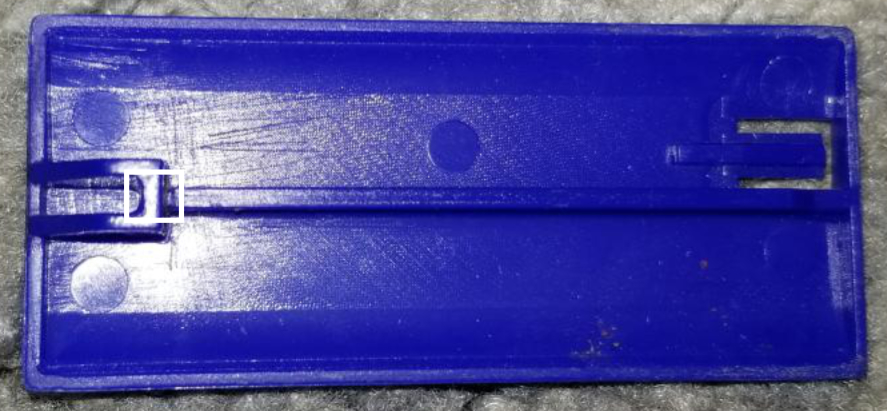
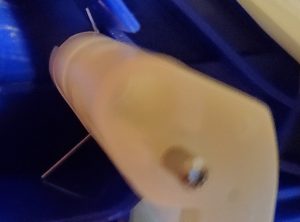
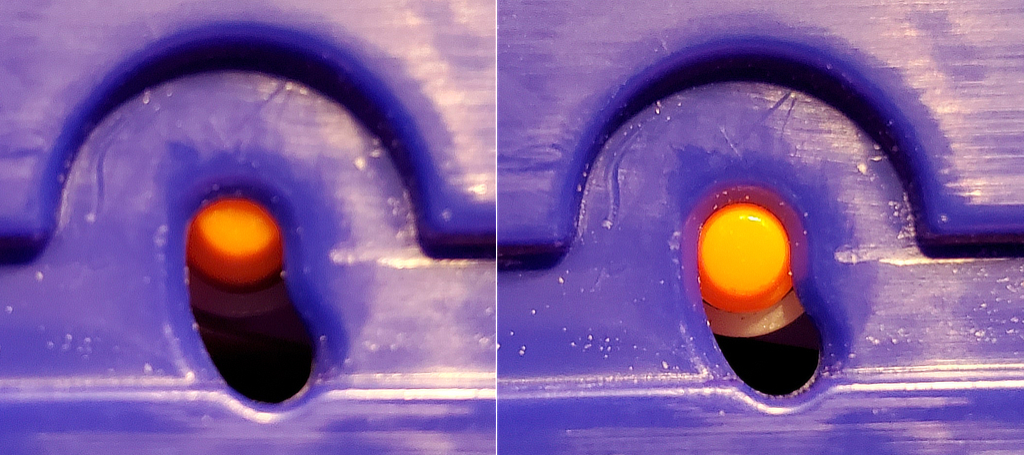
If you notice the barrel wants to stay a litle open, you might have the reset button misaligned, like in the picture below. If so, applya little pressure to the button with a pen or a screwdriver then gently push it toward the bottom of the blaster and it will correctly align.
Once reassembled, verify the door slides cleanly and away you go. You’ll find the loading does require a little more pressure, but you can now top up no matter how many rounds are still in the magazine.

 Enjoy!