
The Story So Far
In the few days since I posted my original teardown article, a number of videos have popped up reviewing, discussing issues that folks have found, and even a mod guide. I will continue updating the original article with thinks to other’s reviews as I come across them.
Issues Reported
There are two more common issues reported with the Accelerator so far. BuffDaddy and Out of Darts have both found that for batteries more robust than a 2S, the flywheels spin right off the motor shaft. This does not seem to be a breakage issue with 2S or “lesser” batteries. BuffDaddy has already been in contact with Prime Time Toys, and more remarkable, they have responded. As reported here:
We were aware of this issue- adjustments are being made. We had tight turnaround time with this item’s development. Retailers moved the item up from a Fall ’18 launch to a Spring ’18 launch; so we are continuing to improve production.
The other common issue is the return spring on the pusher is on the weak side, causing it to stick open, or partially open, most often ( almost exclusively in reports ) when using a Rival stick mag. I noticed on dry firing after reassembly, I had this same problem with no mags loaded, suggesting this might also/instead be a lubrication issue.
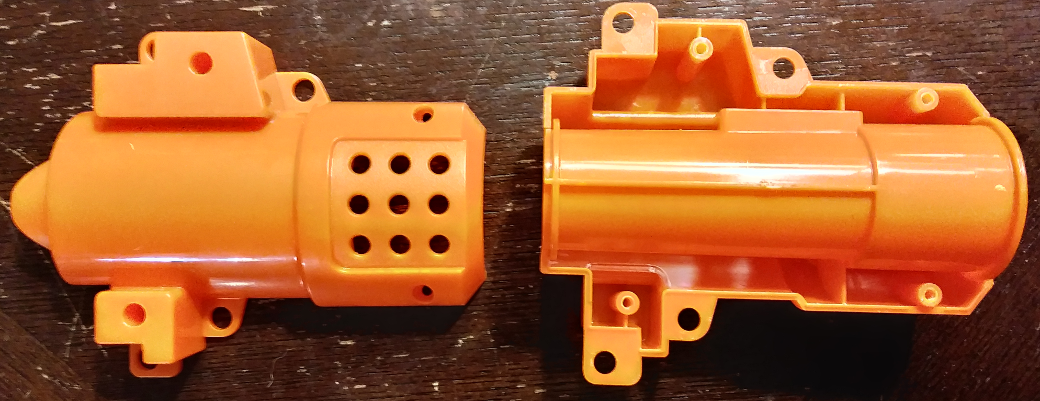
Barrel Disassembly
In all of the videos and articles on this blaster we’ve seen so far, no one has seen to take apart the barrel. I thought this deserved a look as it adds another place for third part customer parts to come in to play. The barrel “floats” on four pegs in the blaster. Simply pul it out and remove four screws and you’ll find the clamshell over the actual barrel.
 |
| screws removed. |
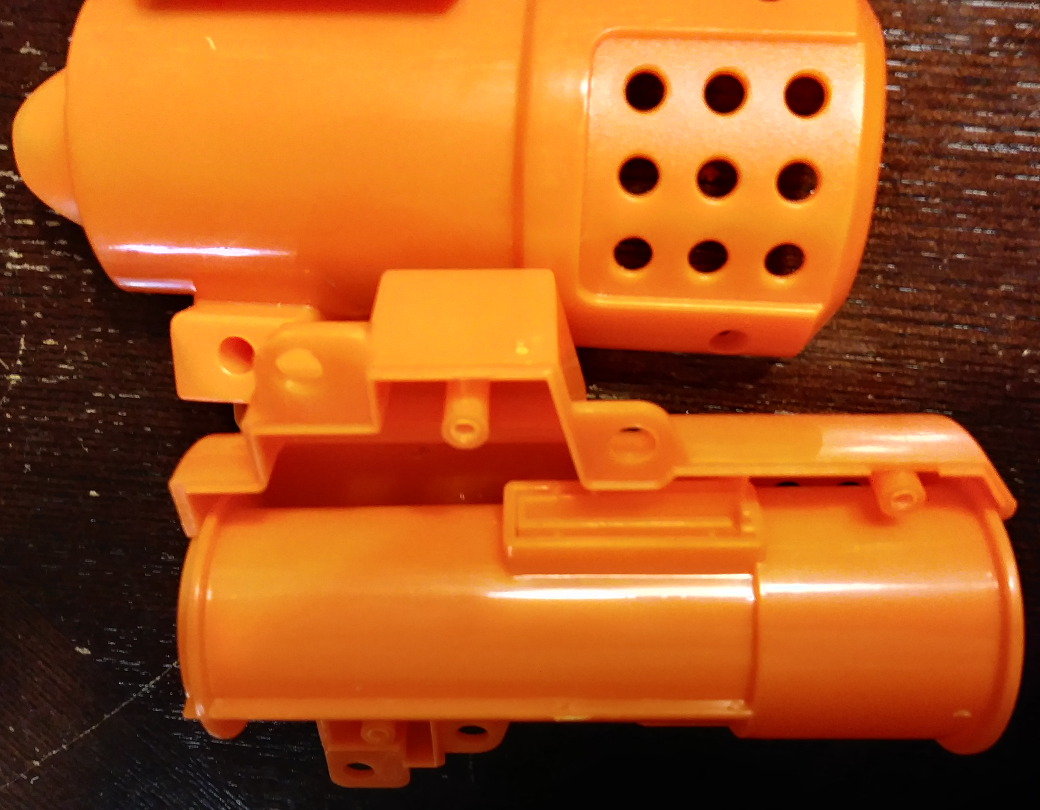
The barrel sits in the clamshell, held in place by lining up the horizontal ridge seen above with a trough and making sure the housing for the hop-up tab is facing upward. It is snug, but not overly tight.
 |
| tilted for a better look at the hop-up inset |
Interestingly, the hop up tab pops out. It two is held in place just by friction and compression, no adhesive or screws. This suggests the option of alternate hop-up tabs, easily altering, or completely removing the hop-up without cutting.
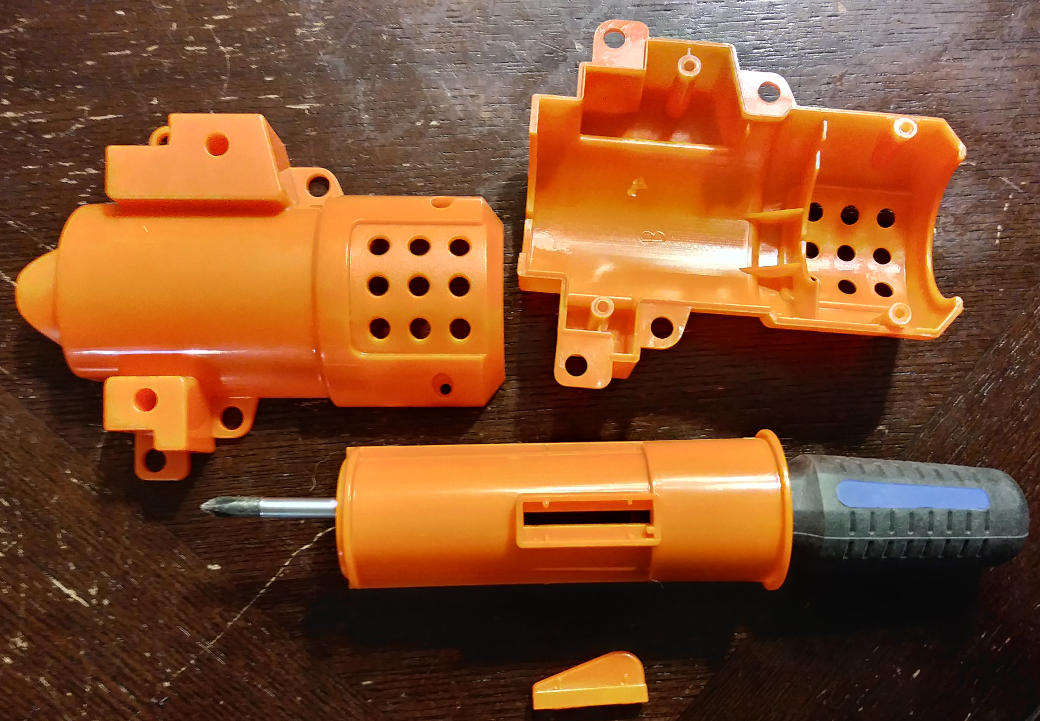 |
| fully disassembled with the hop-up housing rotated 90 degrees |
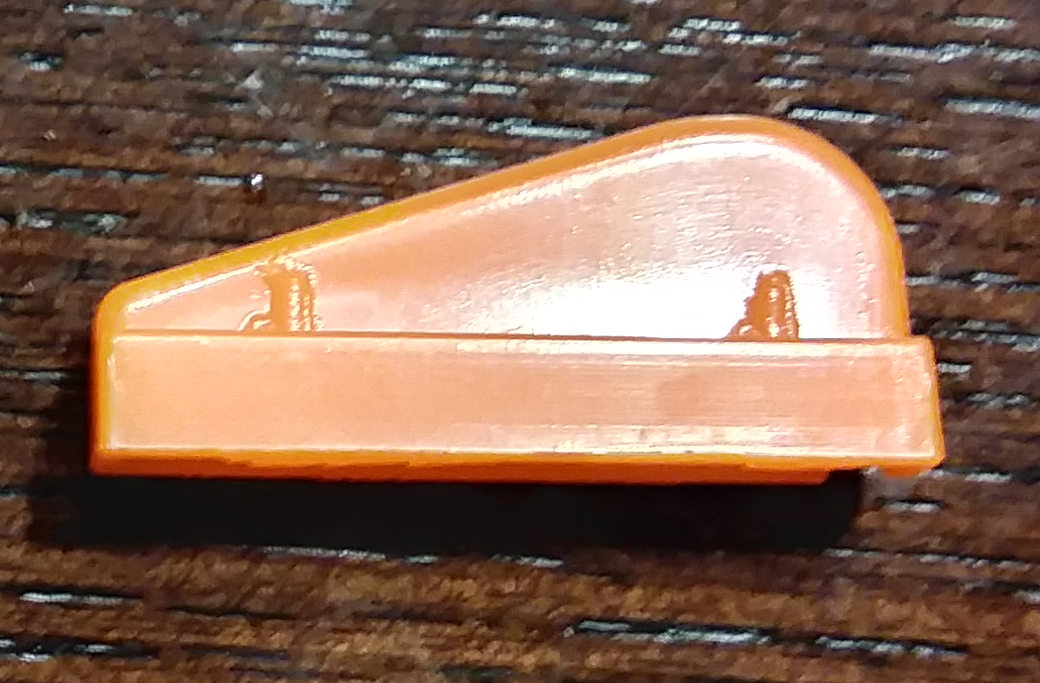 |
| hop-up tab close-up |